WiFi-enabling a remote IR RGB bulb with a Raspberry PI
Table of Contents
1 Description
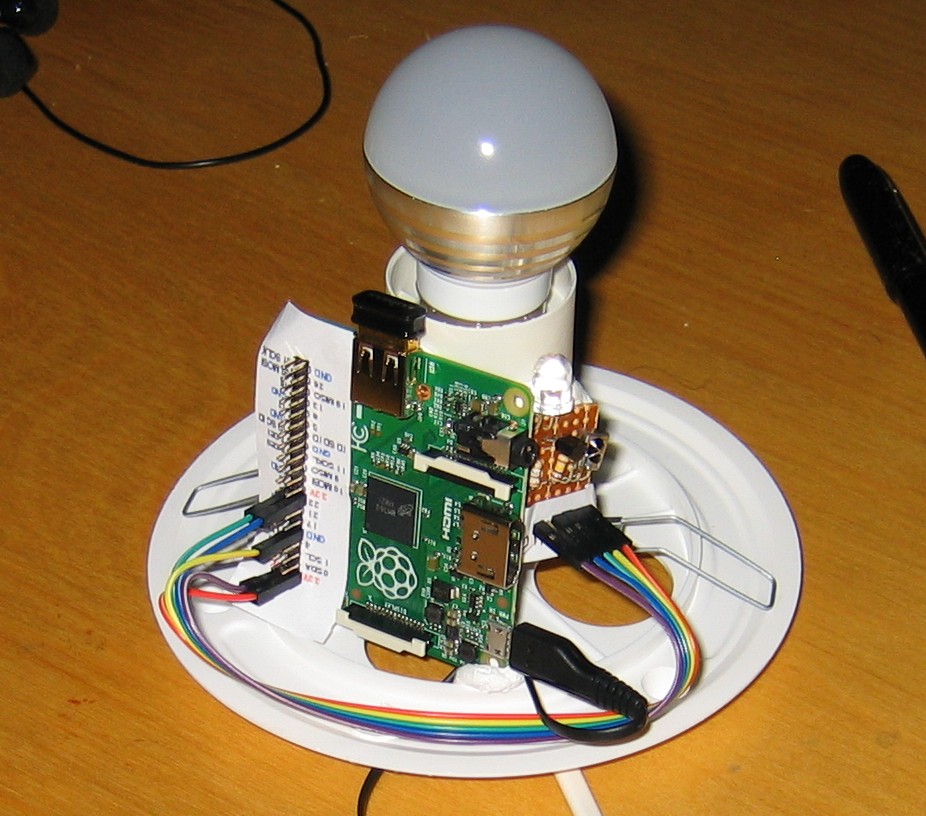
This page describes how I use a Raspberry PI to control an infrared remote-controlled RGB LED bulb mounted inside a lamp.
2 News
- 8 Mar 2015: initial
3 Hardware
- Raspberry PI Model A+
- An expensive micro SD card (expensive to decrease chance of SD card corruption after unclean shutdowns of the PI)
- Edimax EW-7811Un wifi usb adapter
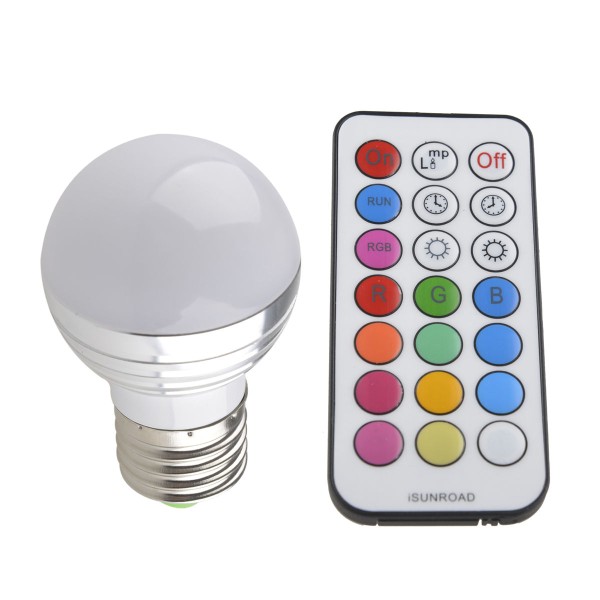
- Cheap RGB LED E47 with remote from ebay (picture)
- IKEA FADO table lamp
- Samsung 5V 0.7A microusb charger (0.7A seems to work)
- 1838 IR receiver module (What I had lying around)
- NPN transistor
- 100k resistor
- 47 resistor
- 5mm IR LED
5 Making the IR transmitter and receiver
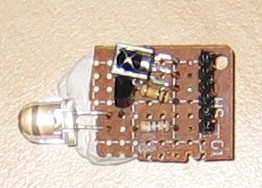
I used the schematic from the Rasbberry PI IR schematic from alexba.in. My IR receiver have the pins different and I replaced one of the IR LEDs with a 47 resistor. I do not know if replacing a IR LED with a 47 resistor is good, bad or irrelevant.
Here is how it looks:
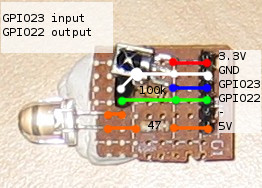
And here is an annotated version showing what is connected to what on
the other side. GPIO23 is an input pin and GPIO22 is an output pin
from the PIs perspective:
6 Setting up LIRC
- Install LIRC
sudo apt-get update
sudo apt-get install lirc
- Load modules by adding the following lines to
/etc/modules:
lirc_dev
lirc_rpi gpio_in_pin=23 gpio_out_pin=22
- Allow loading the modules by adding the following line to
/boot/config.txt:
dtoverlay=lirc-rpi,gpio_in_pin=23,gpio_out_pin=22
- Set up LIRC by setting editing relevant lines in
/etc/lirc/hardware.conf:
DRIVER="default"
DEVICE="/dev/lirc0"
- Reboot
7 Recording IR signals
- Ensure LIRC is set up, see previous section.
- Shut down the LIRC service
sudo /etc/init.d/lirc stop
- Start recording signals from our receiver to a conf file
sudo irrecord -d /dev/lirc0 ~/lircd.conf.mine
- Follow instructions and record keys of the remote. You can name keys anything as long as you use lower-case letters. I had to do this three times before it recorded the signals correctly for it to work when sending signals though LIRC. My problems might be because I was too quick filling out the second line of dots in the first step of the irrecord program. I just clicked the same button as fast as I could instead of holding it down for a second and using different buttons.
- Give your newly recorded signals a name by editing
~/lircd.conf.mineand changing the line starting withname:
name ledremote
- Tell LIRC to use your signals:
sudo cp ~/lircd.conf.mine /etc/lirc/lircd.conf
- Start up the LIRC service again
sudo /etc/init.d/lirc start
8 Sending IR signals
- Ensure LIRC is set up and running
- Figure out your remote name from
/etc/lirc/lircf.conf, for this example, the name isledremote. - Figure out which of the recorded signals from
/etc/lirc/lircf.confyou want to send, for this example, we want to send thebluesignal. - Run irsend
irsend SEND_ONCE ledremote blue
9 My recording of the RGB LED remote
Download: lircd.conf.ledremote
Or see what the file looks like here:
# led remote
# KEY_Fn are buttons starting top left going left to right, top to bottom

begin remote

  name  ledremote
  bits           16
  flags SPACE_ENC|CONST_LENGTH
  eps            30
  aeps          100

  header       9123  4460
  one           627  1640
  zero          627   510
  ptrail        629
  repeat       9125  2194
  pre_data_bits   16
  pre_data       0xFF
  gap          108219
  toggle_bit_mask 0x0

      begin codes
          on                       0xA25D
          off                      0xE21D
          run                      0x22DD
          rgb                      0xE01F
          brightness_up            0xA857
          brightness_down          0x906F
          red                      0x6897
          green                    0x9867
          blue                     0xB04F
          orange                   0x30CF
          light_green              0x18E7
          light_blue               0x7A85
          purple                   0x10EF
          yellow                   0x38C7
          lighter_blue             0x5AA5
          light_purple             0x42BD
          beige                    0x4AB5
          white                    0x52AD

          KEY_F1                   0xA25D
          KEY_F2                   0x629D
          KEY_F3                   0xE21D
          KEY_F1                   0xA25D
          KEY_F4                   0x22DD
          KEY_F5                   0x02FD
          KEY_F6                   0xC23D
          KEY_F7                   0xE01F
          KEY_F8                   0xA857
          KEY_F9                   0x906F
          KEY_F10                  0x6897
          KEY_F11                  0x9867
          KEY_F12                  0xB04F
          KEY_F13                  0x30CF
          KEY_F14                  0x18E7
          KEY_F15                  0x7A85
          KEY_F16                  0x10EF
          KEY_F17                  0x38C7
          KEY_F18                  0x5AA5
          KEY_F19                  0x42BD
          KEY_F20                  0x4AB5
          KEY_F21                  0x52AD
      end codes

end remote
10 Putting it together
The PI and IR circuit fits snugly inside the lamp, I used plenty of blu-tack to hold everything in place.